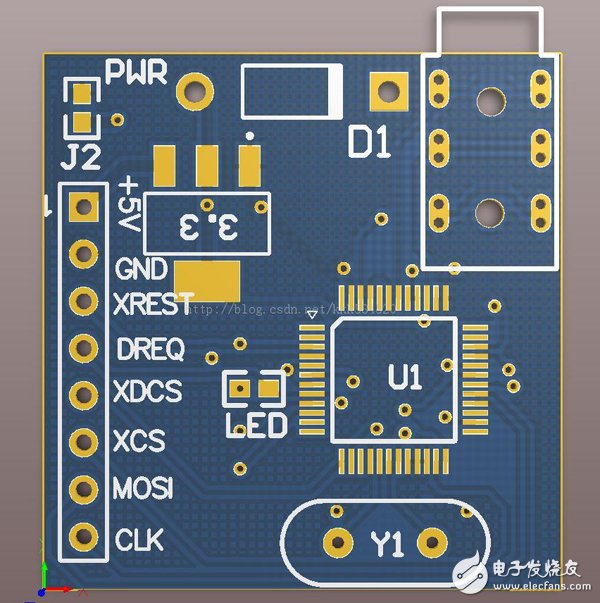
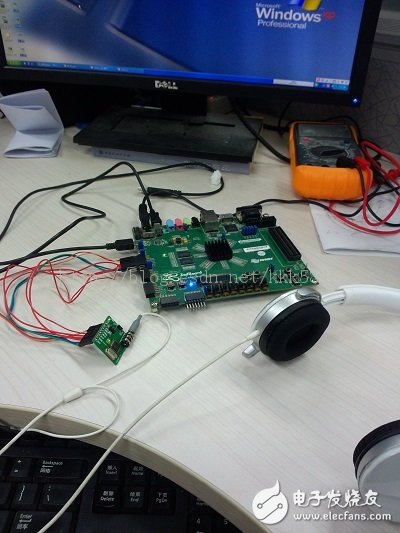
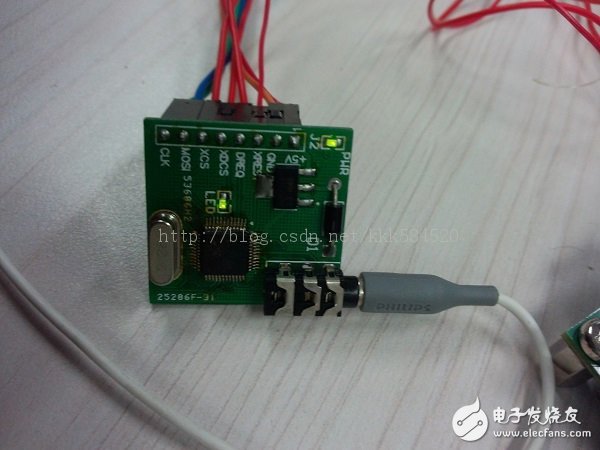
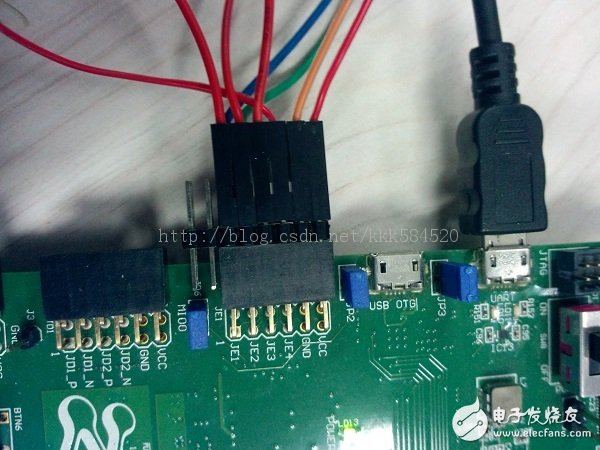
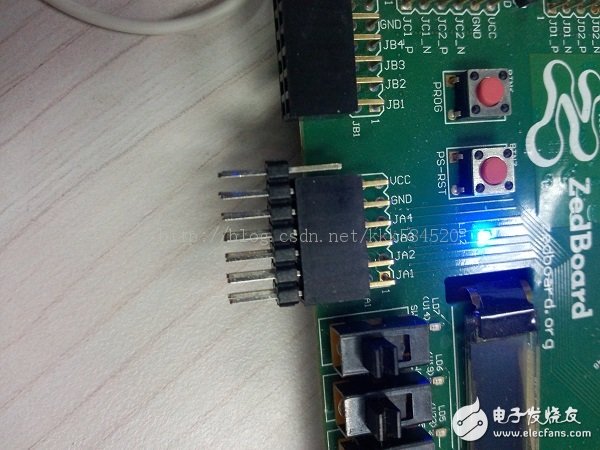
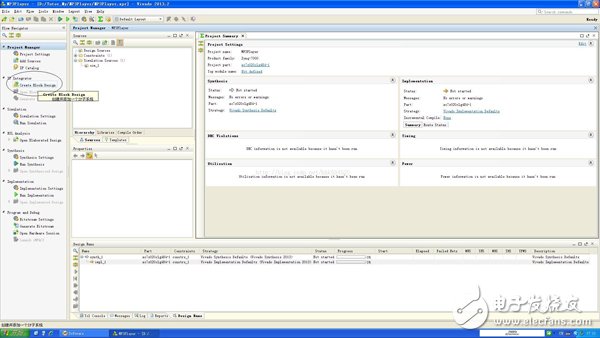
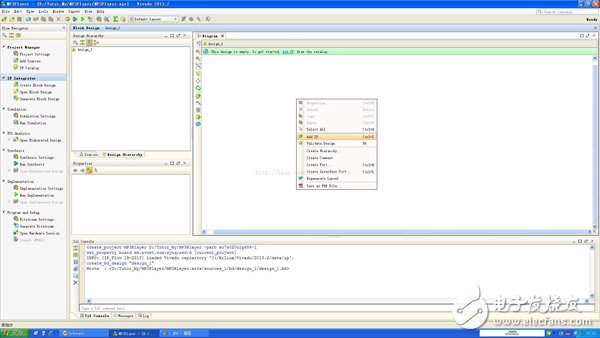
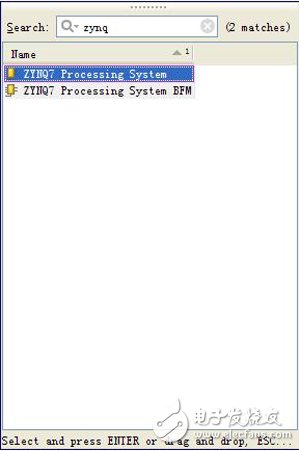
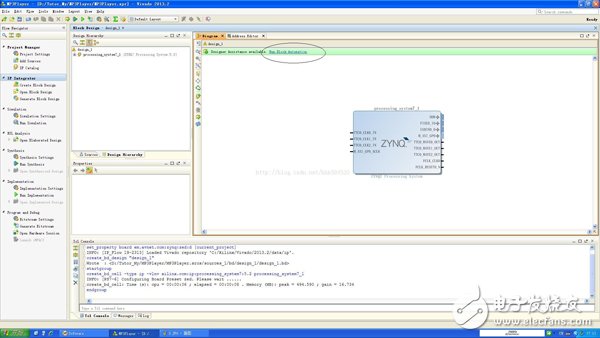
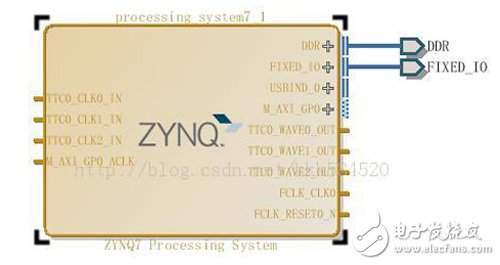
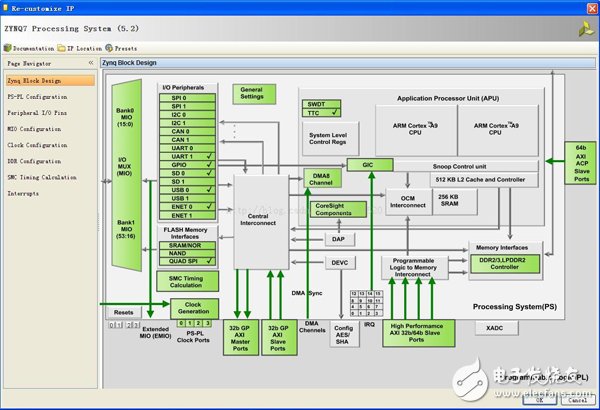
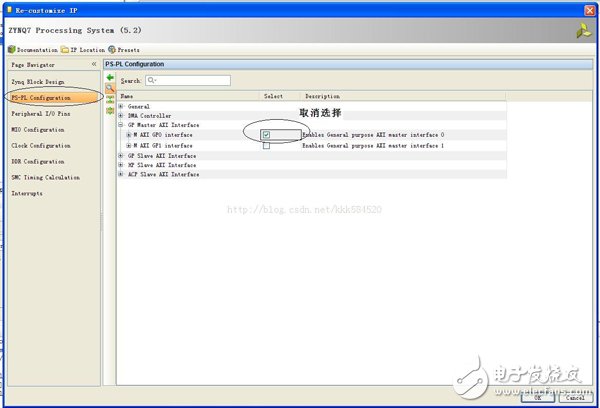
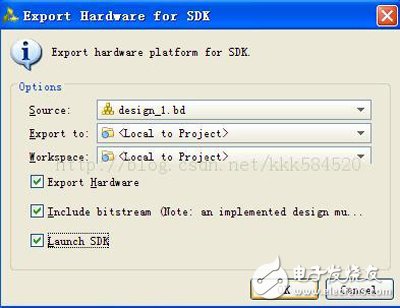
This article will present the process of developing a PS bare metal application on the Zynq platform via the Vivado IDE. Readers will see Vivado development more efficient and faster. We have heard of MP3, now we can use ZED-Board to listen. There is an audio chip ADAU1761 on the board, which can realize recording and playback, but does not have MP3 decoding function. Zynq dual-core ARM9 MP3 software decoding should be achievable, but the blog owner has a VS1003, can achieve MP3 hardware decoding, the software will be simplified, interested in the MP3 decoding principle can deeply study how to use the CortexA9+ADAU1761 to achieve MP3 playback . The circuit diagram is as follows: The VS1003 control is implemented using Zynq MIO, so that it is only related to PS, and the PL can be completely discarded. Based on this section, the reader can try to move the SPI module to the PL, which can reduce the PS part IO read and write frequency and improve CPU utilization. The physical connection diagram is as follows: The Zynq board is externally connected to the mother. In order to use the DuPont line, a double male pin is required, which can be pressed with a common single row 2.54mm pin. The software development process is described below. Create a Vivado project, named MP3Player, and follow the steps in the previous section Vivado to build the project. Once in the IDE, click Create Block Design under IPI Integrator in the Process Manager on the left. This tool appeared only after the 2013.1 version and will replace XPS to complete system integration. Right click in the editing area, select Add IP..., keep the default design_1.bd Enter zynq in the search box, double click on the first one, add IP to the circuit diagram. After the addition is completed, the wiring is automatically connected. Click the circle area Run Block AutomaTIon in the figure below. Waiting for completion, the result is shown below. As you can see, DDR and fixed IO are automatically connected. This is because we chose ZedBoard DVK when building the project, so that we can automatically connect the pins to the corresponding peripherals according to the board description. In addition, it is seen that M_AXI_GP0 is enabled by default, and the PL part can be controlled by connecting the IP of the AXI slave interface to the PS. This section is not required, so it must be disabled, otherwise an error will be reported when verifying the design. Double click on the box, see the picture below I saw a familiar and unfamiliar picture, some like the Zynq view in XPS, but a lot more streamlined. Click "PS-PL ConfiguraTIon" on the left, the interface is as follows: Deselect the AXI GP0 interface and confirm it to return to IPI. Once you're done, first implement Open Implementated Design and export to the SDK. Once you're done, first implement Open Implementated Design and export to the SDK. If you do not do this, the second item in the above picture will be grayed out. The SDK is developed later, which is the same as in this series of tutorials (3). Establish ApplicaTIon project, C project, template helloworld. Change the code to the following: Indoor Rental LED Display is hot selling product in the led screen market. We usually use Nova MSD300 sending card and MRV328 receving card, other controll system also can be accepted, like Linsin,colorlight and so on.....About the led lamp, we use kinglight led lamp, IC is ICN2038S, refresh rate is 1920hz. We also provide other option if the client need higher quality, like Nationstar led lamp and refresh rate can make 3840hz. This 500x500mm LED display panel can also can make curved led display, ±15° flexible curved option. Indoor Rental LED Display,Advertising Led Display,Indoor Led Display,Rental Led Display Guangzhou Chengwen Photoelectric Technology co.,ltd , https://www.cwleddisplay.com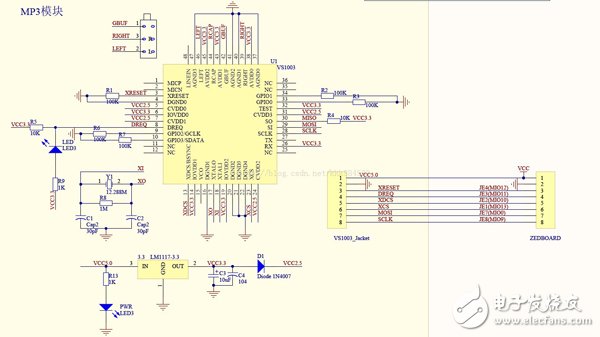
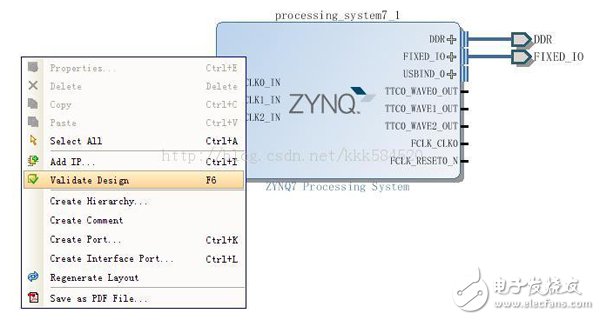
Verify the design, right click in the blank space and click on Validate Design. Nothing is wrong, just confirm it. 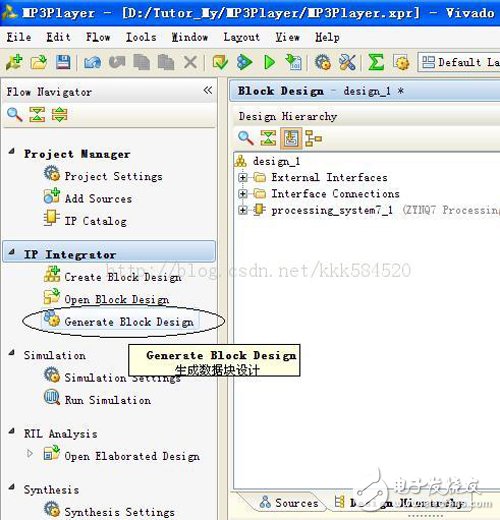
Click Generate Block Design at the above location to confirm. 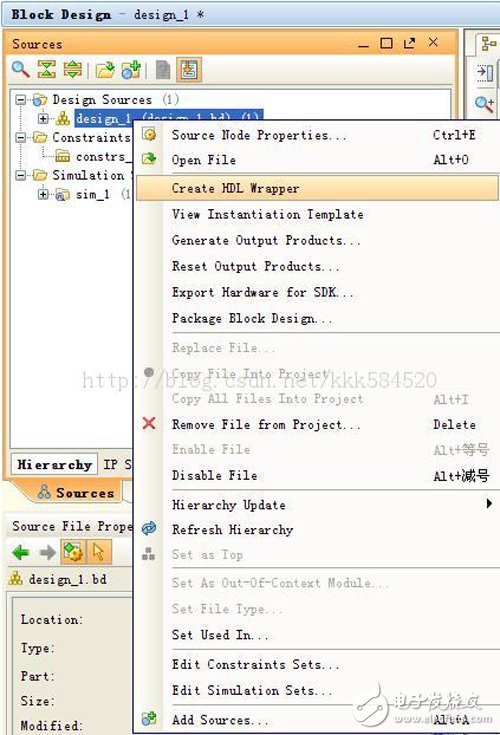
Find design_1 in the Sources window and right click to generate the top-level HDL wrapper. confirm. 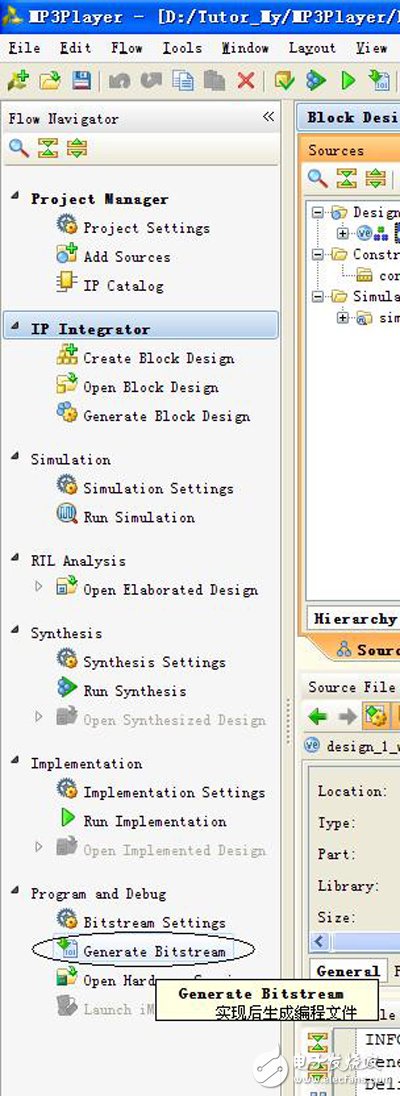
Directly click on the Generate Bitstream in the left flow, one step in place. It takes about 5~8 minutes to complete the bit stream. 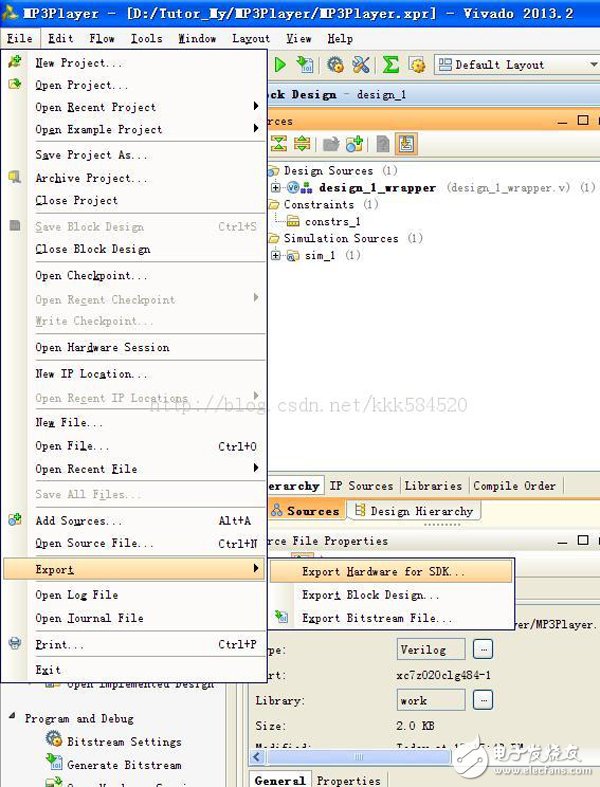
#include
#include "platform.h"
#define MIO_BASE 0xE000A000
#define DATA0 0x40
#define DATA0_RO ​​0x60
#define DIRM_0 0x204
#define OEN_0 0x208
Void delay(unsigned int t)
{
Unsigned int i,j;
For(j=0;j
Application:
* Business Organizations:
Supermarket, large-scale shopping malls, star-rated hotels, travel agencies
* Financial Organizations:
Banks, insurance companies, post offices, hospital, schools
* Public Places:
Subway, airports, stations, parks, exhibition halls, stadiums, museums, commercial buildings, meeting rooms
* Entertainments:
Movie theaters, clubs, stages.